Fortunately the Roku TV interface gives you the ability to change the name of the input to make it easier to identify. Our tutorial below will show you how to rename an input on a Roku TV.
How to Change the Name of an Input on a Roku TV
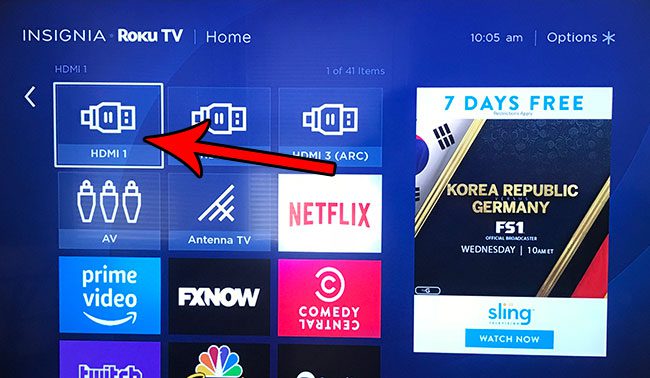
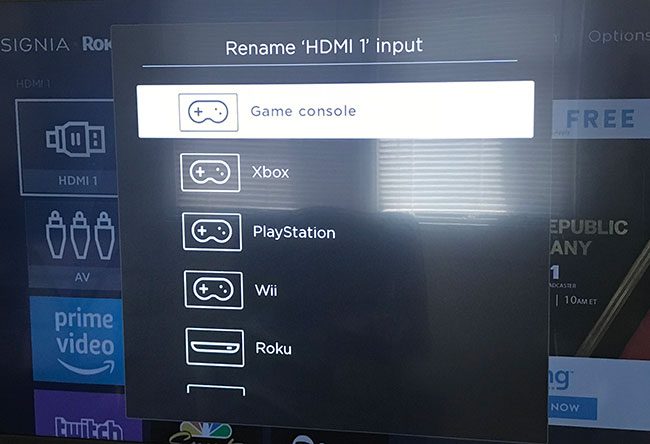
The steps in this article were performed on an Insignia TV, but will work for other models of TV that are using the Roku TV interface. Note that there are a number of preset options from which you can select, but there is also a custom option at the very bottom of the list that you can use if none of the presets accurately reflect what you would like to call the input. Step 1: Turn on the TV. Step 2: Select the input that you would like to rename, then press the * button on your Roku TV remote.
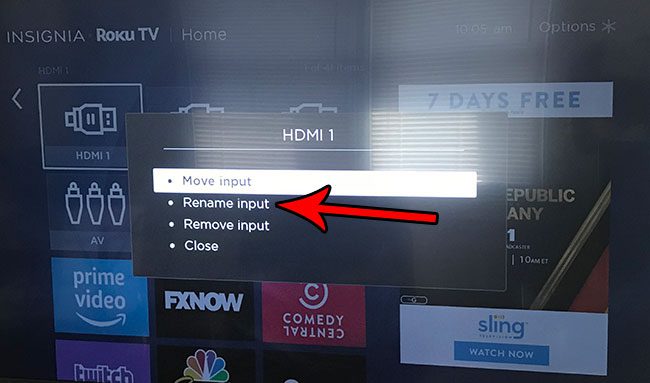
Step 3: Select the Rename input option.
Step 4: Scroll down and select the name that you would like to apply to this input. As mentioned previously, there is an option at the very bottom of this list where you can choose to give the input a custom name and icon.
Do you have another TV that doesn’t have the Roku interface, but you like Roku and would like to be able to use its features on that TV as well? Find out more about the Roku Premiere Plus and see if it’s something that you might want to purchase and connect to that device. After receiving his Bachelor’s and Master’s degrees in Computer Science he spent several years working in IT management for small businesses. However, he now works full time writing content online and creating websites. His main writing topics include iPhones, Microsoft Office, Google Apps, Android, and Photoshop, but he has also written about many other tech topics as well. Read his full bio here.
You may opt out at any time. Read our Privacy Policy